
Peter's Nostalgia Site
If viewing with a smart
phone or tablet then turn it sideways for a better view.
Text in blue/pink are hyperlinks. Click on these for further information.
|
Peter's Nostalgia Site
Text in blue/pink are hyperlinks. Click on these for further information.
|
|
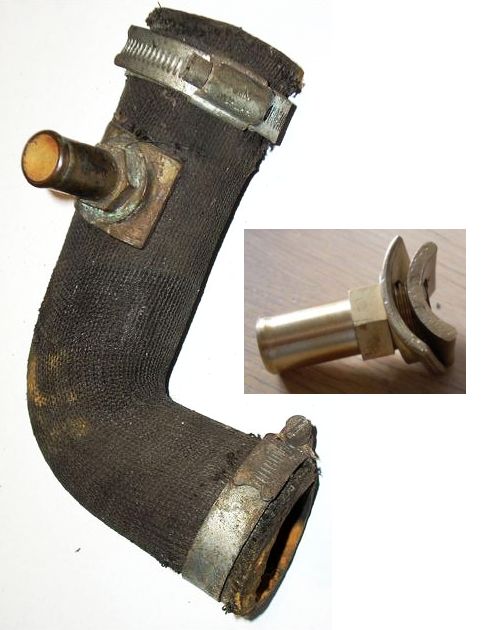
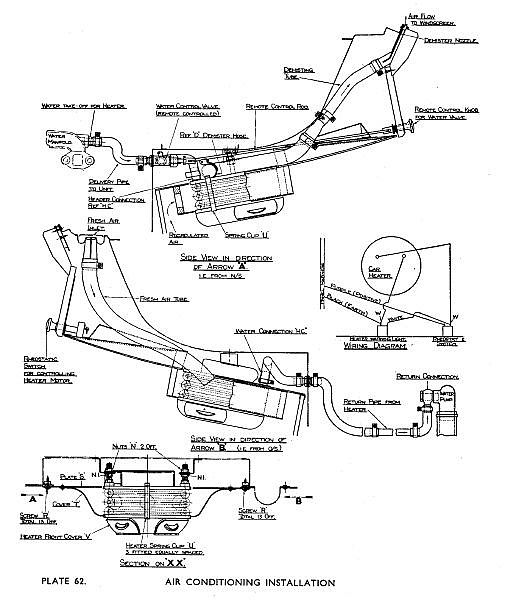
Fitting a Heater and Radio to a 1939 SS Jaguar Unlike their post war counterparts the pre-war Jaguars were never fitted with a heater. With a large diameter exhaust pipe running down each side of the car there is a small element of under floor heating but I decided that this was insufficient for a car based in Scotland and so I acquired the parts of the Clayton heater and its controls from a MkIV Jaguar and fitted these to my car. The heater controls in the MkIV are mounted on the lower part of the dashboard but I wanted to retain my original SS dashboard so I copied the MkIV heater enclosure but arranged for the controls to be under the dashboard. The first cars to be fitted with a heater were the 1940 models and whilst it's not difficult to add a connection to the water manifold the bottom hose connection is more tricky. The 1940 cars tapped into the bottom hose with a brass fitting. (Thanks to Ed Nantes for the 1940 part photos.) I didn't possess this adaptor but acquired a bottom hose for a Vauxhall Firenza that included a "T" piece.
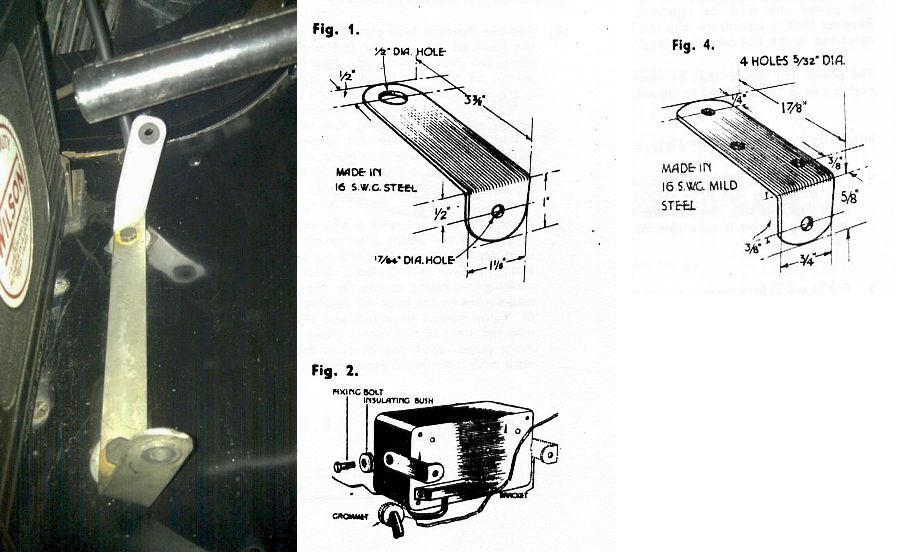
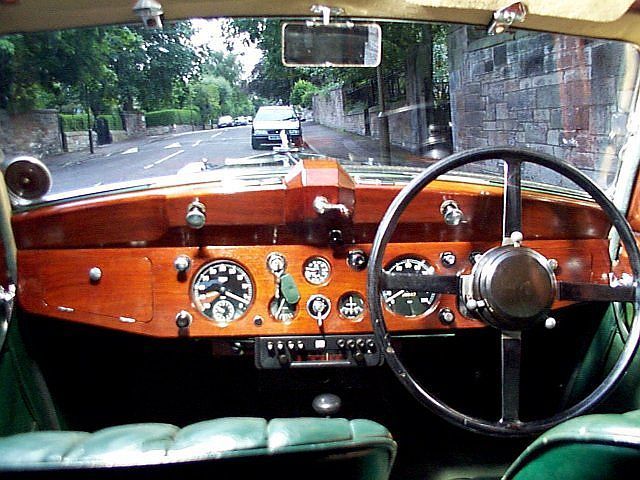
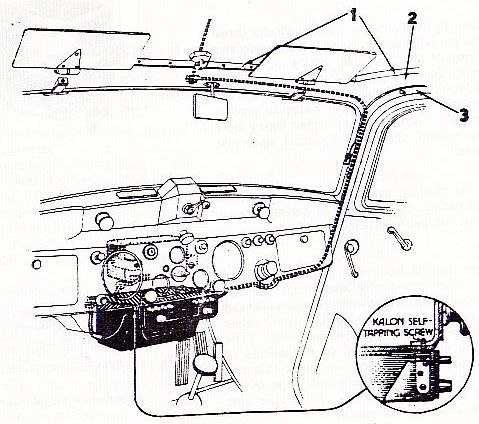
The MKIV heater enclosure also makes provision for mounting an HMV Radiomobile 100 radio and I copied this but arranged it such that the heater controls lie on a panel behind the radio and on either side of it. My scruffy sketch of a MkIV enclosure from about 25 years ago is here. The power supply is normally mounted under the bonnet on the scuttle and the fitting instructions suggest making two brackets (Fig. 1) with mounting holes lined with grommets to give sound insulation from the vibrator. I revised this to a single folded steel bracket that I fitted behind the battery rather than straddling the steering column reinforcement. Two further brackets (Fig. 4) are required to screw the front of the radio to the metal frame of the instrument panel with self tappng screws. Unfortunately the plugs on the interconnecting cable are rather bulky for passing through to the interior without cutting a large hole in the scuttle so I removed one of the connectors to let me pass the cable through a more modest hole and then resoldered it back on again.
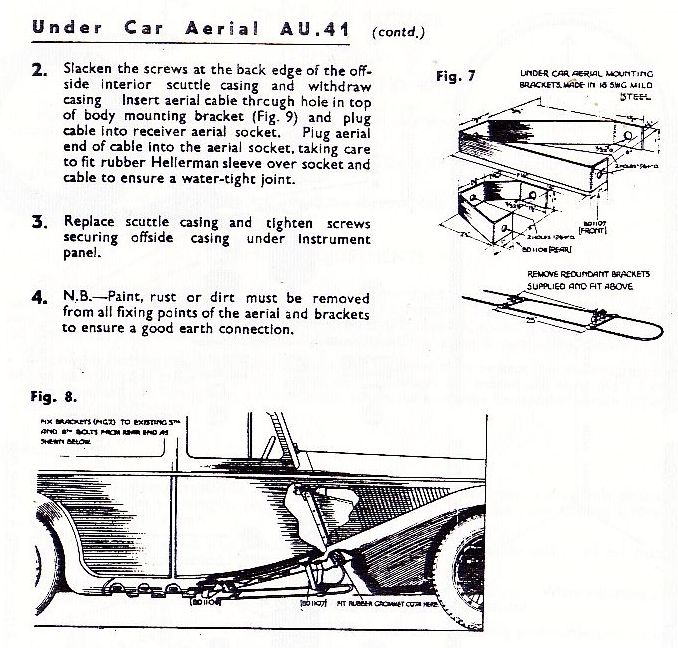
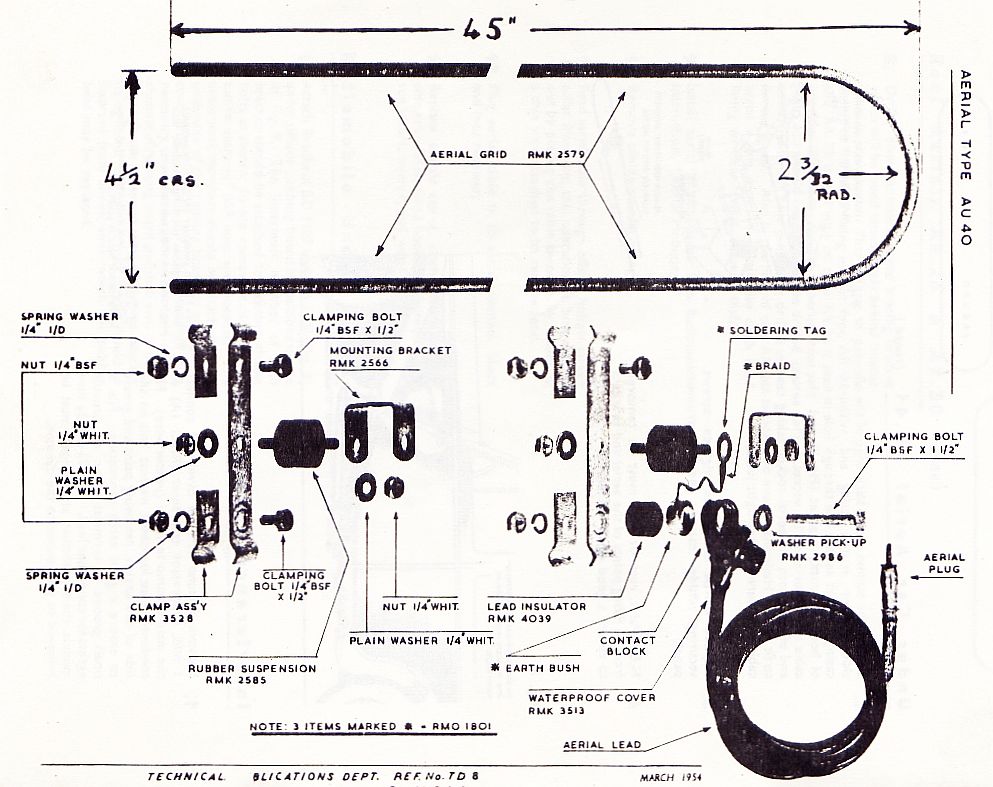
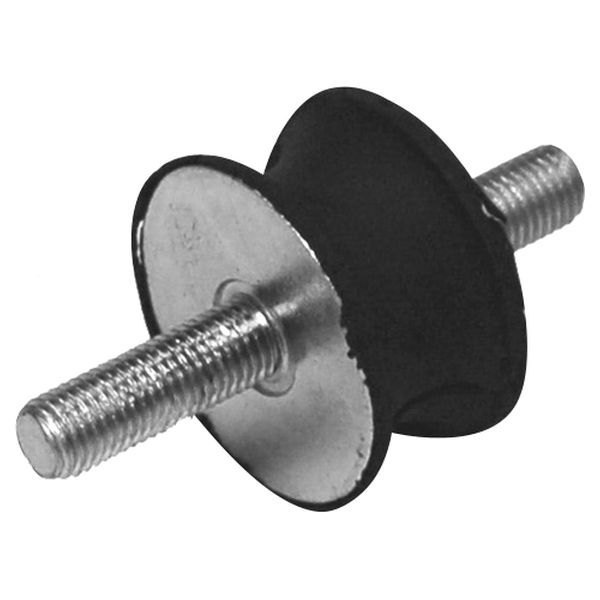
The Radiomobile fitting instructions suggest two types of aerial installation. A roof aerial or an under wing aerial. I was slightly sceptical about the performance of an under wing aerial but I didn't want to drill holes in my roof and so opted for the under wing variety. I made the aerial rod from "off the shelf" copper tubing and the brackets from scrap steel. The insulators are small rubber exhaust hangers.
Much to my surprise I found that the under wing aerial works very well and doesn't suffer from ignition interference even when the car is within the confines of the garage. However, the Jaguar MkIV for which the above fitting instructions were written has a gear lever that is angled backwards unlike the SS Jaguar one that is vertical. I do like my vertical lever but it did cause me to occasionally skin my knuckles on the underside of the radio so I eventually decided that the radio must go! The Service Information for the Radiomobile 100 can be found here. The following short video was shot in 1996 following my gearbox overhaul to demonstrate the synchromesh but it also demonstrates the radio installation towards the end.
|
.jpg)
.jpg)
.jpg)
.jpg)
.jpg)