
Peter's Nostalgia Site
If viewing with a smart
phone or tablet then turn it sideways for a better view.
Text in blue/pink are hyperlinks. Click on these for further information.
|
Peter's Nostalgia Site
Text in blue/pink are hyperlinks. Click on these for further information.
|
|
|
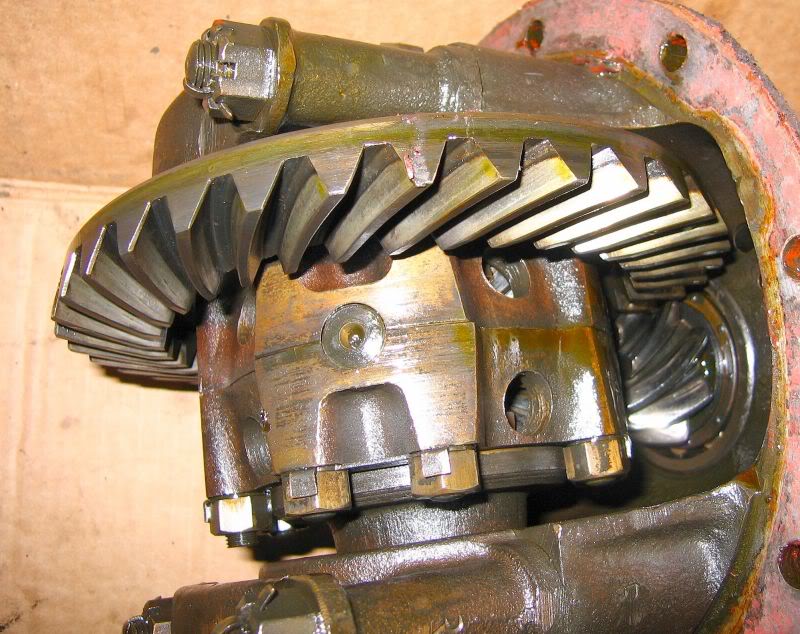
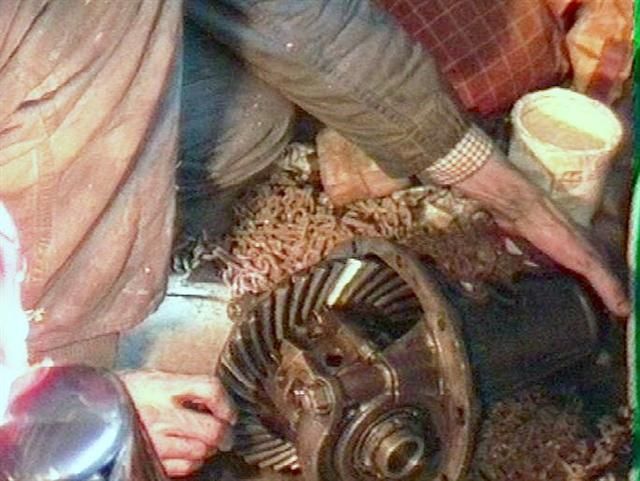
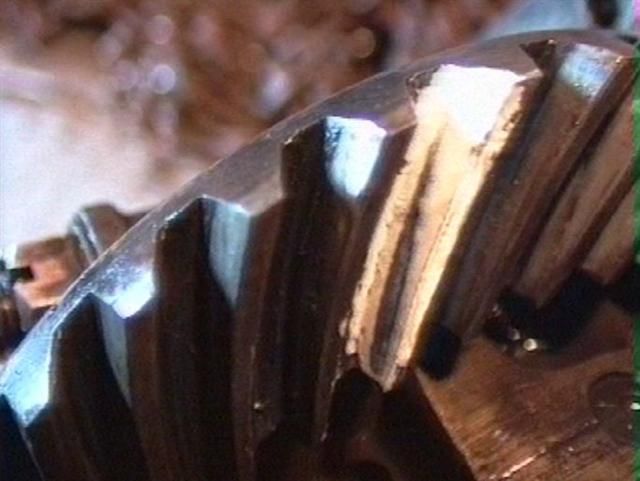
Rear Axle Overhaul 10th August '94 When I drove my 1939 2½ litre saloon for the first time I was somewhat disappointed by the level of back axle whine but due to my own ignorance I was deterred from attempting a repair. I had unthinkingly assumed that noise was caused by worn gear teeth and that new or less worn replacement parts would be expensive and difficult to obtain. Having recently read some vintage text books on repair of cars of the period it began to dawn on me that it might just be slackness in bearings that was my problem. This was a doubly cheering thought knowing that the bearings in question were taper rollers and therefor adjustable. Another small deterrent to attempting a repair was my lack of a dial gauge. But these appeared to be easily obtainable at autojumbles so after recently acquiring one I decided to set to. In the pre-war ENV axle the half shafts are very easily extracted and caused me no drama. The diff unit is a heavy item when you are trying to remove it whilst lying beneath the car but a small trolley jack served to restrain its fall. Having extracted the diff unit from under the car it was very clear that the crown wheel bearings were slack and a check on the tooth meshing revealed the worst type of contact; that at the heel of the teeth. According to various sources heel contact (that at the outer rim of the crown wheel) will eventually result in that part of the tooth breaking off. Contact concentrated at the toe follows a close second in the horrors. Both are liable to result in increased noise. Other information that I gleaned was that excessively deep meshing will result in a growling axle and that slackness in the crown wheel assembly bearings is a very significant contributor to the level of whine. I read the set-up instructions for several makes and models of cars to try to better understand what to aim for in setting the bearings. The message seemed to be almost identical in all cases. Tooth contact patterns appear in most descriptions and generally show best contact to be at half tooth depth and spread from the toe end to approximately two thirds of the way to the heel. This should be achieved with a backlash at the rim of the crown wheel of approximately 5 or 6 thou. Some axles are set with a defined pre-load (or compression) of the bearings whilst others such as my ENV require free rotation without end play. To achieve all this there are basically three adjustments, fore and aft movement of the pinion, sideways movement of the crown wheel assembly and preload of the crown wheel bearings.
In the ENV axle the
taper roller bearings for the crown wheel are each adjustable by
a large nut and lock nut. Tightening the nut on either side will take up the end
play and
tightening one side whilst slackening the other allows the crown wheel to be
moved
The fore and aft adjustment of the pinion in the ENV is achieved by screwing the bearing supports in or out. Intuition might suggest otherwise, but the movement of the pinion is used to adjust the penetration of the teeth i.e. how high or low the contact mark appears, and sideways movement of the crown wheel assembly is used to move the contact pattern in the heel to toe direction. Various tooth contact marking indications are suggested, such as engineer's blue but I found that oil based paint was very effective. To get a good impression rock the pinion shaft back and forth whilst in contact with the painted crown wheel tooth and restrain the rotation of the crown wheel to add pressure to the contact. Rocking the pinion shaft several times gives a clearer impression. The backlash on the crown wheel depends on both its own sideways movement and the fore and aft movement of the pinion but the crown wheel movement is the more significant. (Ignore the instructions in the owner's handbook. They are liable to result in incorrect tooth contact.)
Backlash adjustment is
effected by moving the crown wheel. This of course is not
independent of the tooth contact adjustment but the contact setting represents
the course adjustment and the backlash the fine adjustment. I did not possess a
dial
Before attempting the job it seemed to me that there were not enough independent adjustments to achieve the requirements of tooth contact and backlash. In practice my fears proved unfounded and everything appeared to fall into place. The worst part of the job proved to be that of mounting the diff assembly back into the banjo casing. When removing the diff I had used a trolley jack to lower it, but for re-assembly I found it quite difficult to lift the diff into the jack lifting pan whilst lying beneath the car. The diff needs to be offered to the banjo at a substantial upward angle in order to clear the transmission tunnel and at first attempt, needless to say, I tore the new paper gasket that I had made. When the diff was out of the car it was easy to make the gasket using the diff case as a template, but having spent some time positioning the diff on the jack I decided that it was easier to re-make the gasket by taking an impression of the studs on the banjo. Good fortune smiled on me with the second attempt and a friend timed his visit perfectly to help pull the front of the diff upward by means of a rope through the boot whilst I manipulated the jack and diff. This being the first rear axle that I have tackled, the job took the best part of a day but on driving the car that evening all that toil became worthwhile. Prior to the job the axle had been the most dominant source of noise in the car but at no cost other than a day's labour I now have to listen carefully to hear the axle noise and the clunks of excessive backlash are almost totally removed. Furthermore that second paper gasket survived and my garage floor is now dry which it certainly wasn't before the job.
|
|

.JPG)