When I bought my car it
was very much a kit of parts and not a complete kit at that. Some I
was able to source from the usual suppliers but others appeared
unobtainable. With little prospect of an early solution I decided to
try my hand at making the missing items. The nice thing about our cars
is that a high proportion of the parts can be reproduced with only
basic tools.
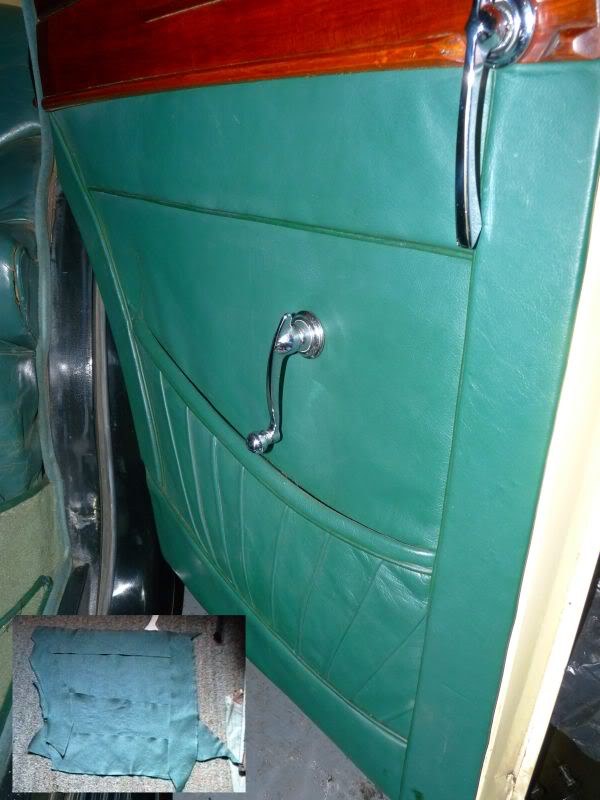
One of the first that I attempted was the nearside rear inner door
card. Fortunately I did have the original for the offside so I had a
pattern all be it in mirror image. My offside card was already in bits
as it needed restitching so I cut out paper patterns for the various
pieces of leather and arranged them as efficiently as I could as one
piece. I was very fortunate that a local leather supplier was able to
provide me with a very good colour match to my existing leatherwork.
Then with some trepidation (the leather isn't cheap) I cut out the
various pieces according to my patterns and stitched them up with my
wife's sewing machine. Domestic machines are not ideal and I got
through quite a few packets of needles before the job was completed
but I think the result is a passable copy of the original. The photo
is current and shows that the stitching has now held together for 17
years. The inset in the bottom left shows the leather pieces prior to
stitching. Not shown is the fact that I used headlining material to
form the door pockets for this and the other doors all of which needed
replacement.
In the end I had cut it pretty fine on the leather and only had enough
left over to make a key fob!
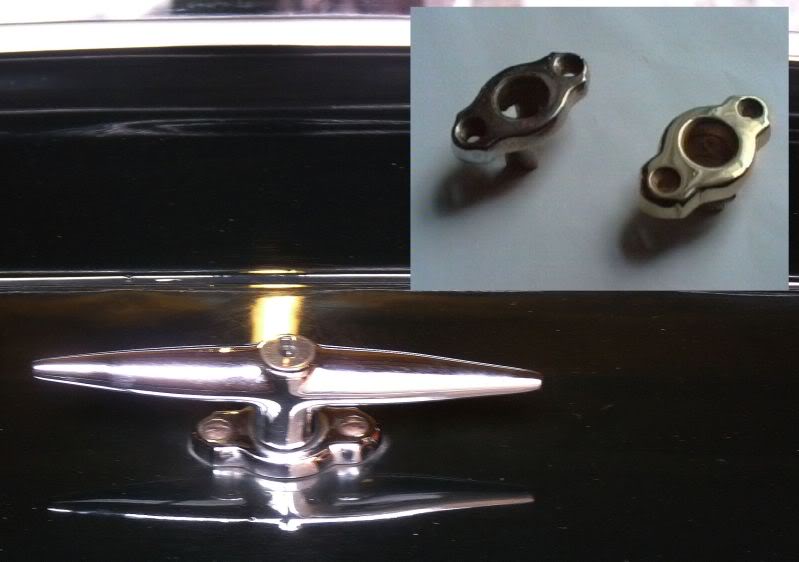
Another part that I couldn't find was the lock body for the boot lid
handle. I did have the original Mazac part but it was broken. In this
case I obtained a small piece of 1/4" thick brass plate to make the
flange with the fixing holes in it and I silver soldered a brass
plumbing fitting to the back in order to form the tubular body. With a
bit of drilling and filing this created a much stronger part than the
original. The chrome plating I left to the professionals.
The inset shows the Mazac part on the left and my brass version,
before it was chromed, on the right.
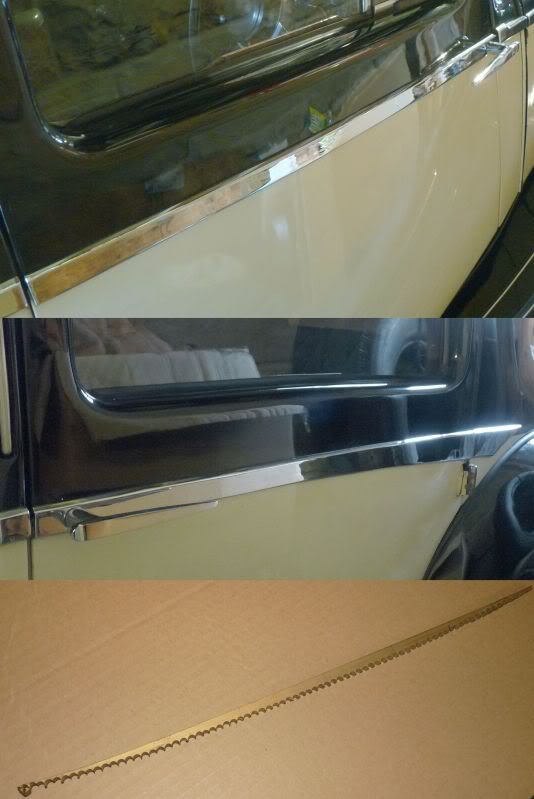
After tackling the boot lid handle I got a little bit more ambitious
and thought that I could also make the chrome waist line strips that
were missing from the driver's and nearside rear passenger doors. Once
again I bought 1/4" thick brass for the purpose and again resorted to
a brass plumbing fitting to form the driver's door lock body. I used
short lengths of brass rod to form the projections that carry the
fixing screws. All the parts were silver soldered.
The driver's door strip didn't prove too difficult because it is
parallel sided but the rear door strip is curved. At first I tried
cutting the full length with a hacksaw but if you've ever attempted to
cut 1/4" brass then you'll understand why I abandoned this. My
eventual solution was to drill multiple holes along the shape of the
strip and then to cut through the webs with the hacksaw. A bit of
grinding and filing produced the desired shape.
The photo shows the "easy" front door and rather labour intensive rear
door strips and one of the offcuts below. Once again the chroming was
left to the professionals.
All of this took place 29 years ago and I've never in the intervening
years come across any spares for these parts so I think it was worth
the effort. Having said that, I did come across one other part that I
made. This was the little flexible shaft that couples the wiper motor
to the pantograph. It was only after seeing one in the flesh connected
to another pantograph that I realised that I had the original after
all. I just hadn't recognised it for what it was.